Are you looking for a sweet treat to brighten up any occasion? Look no further! Lemon pound cakes are a classic dessert that never go out of style. The combination of moist, fluffy cake and tangy lemon flavor is a match made in heaven. And the best part? There’s a variety of ways to mix things up with different flavors and add-ins.
From traditional recipes like our Classic Lemon Pound Cake with Glaze, to creative twists like Lemon Blueberry Pound Cake or Lemon Poppy Seed Pound Cake, we’ve got 18 delicious lemon pound cake recipes that are perfect for any occasion. Whether you’re looking for a show-stopping dessert for a special event or just want a sweet treat to brighten up your day, these recipes have got you covered.
In this article, we’ll explore the world of lemon pound cakes and share some of our favorite recipes with you. So let’s get started and see what all the fuss is about!
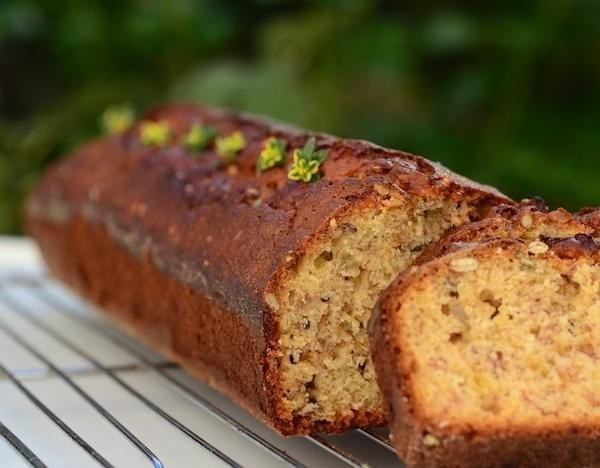
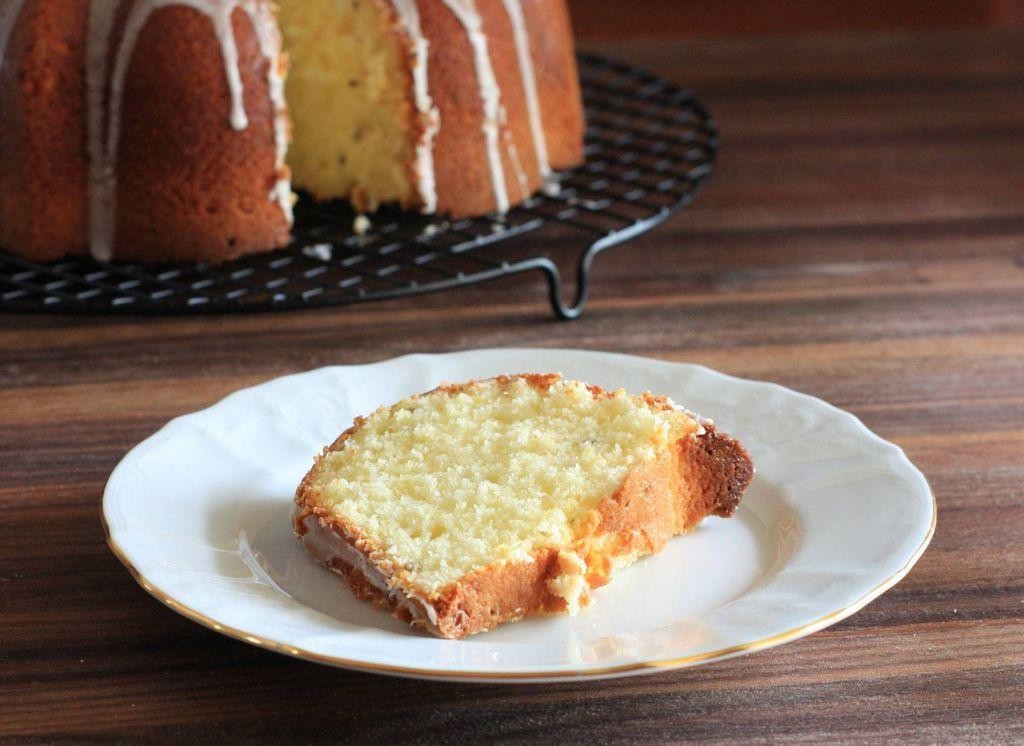
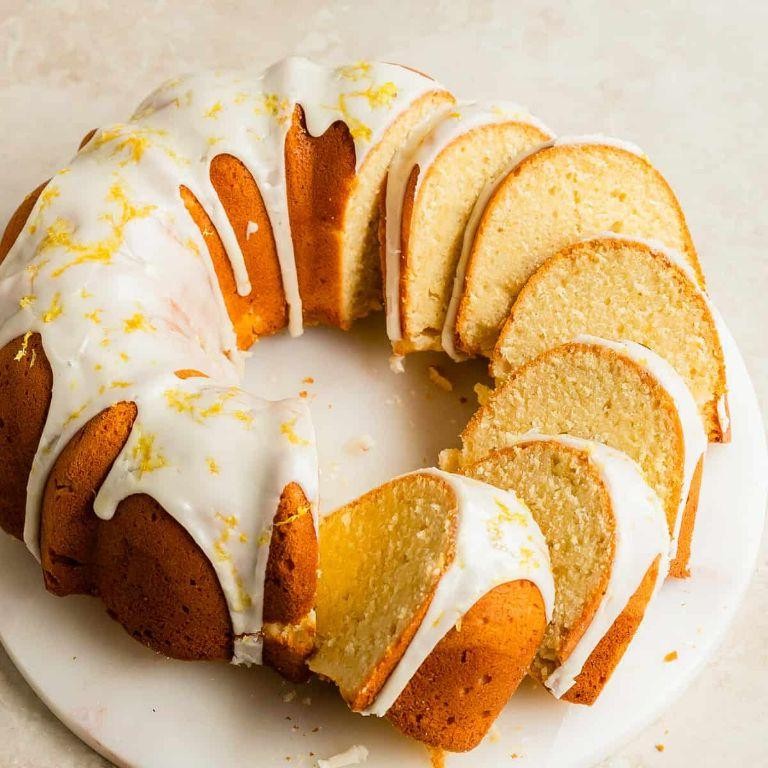
Classic Lemon Pound Cake with Glaze

Brighten up your day with this moist and flavorful lemon pound cake, topped with a tangy glaze that’s sure to satisfy your sweet tooth.
Ingredients:
– 1 1/2 cups (190g) unsalted butter, softened
– 1 cup (200g) granulated sugar
– 4 large eggs, at room temperature
– 2 teaspoons grated lemon zest
– 2 tablespoons freshly squeezed lemon juice
– 2 3/4 cups (315g) all-purpose flour
– Salt, to taste
– Confectioners’ sugar, for dusting
Instructions:
1. Preheat oven to 325°F (165°C). Grease and flour a 9×5-inch loaf pan.
2. In a large bowl, beat the butter and sugar until light and fluffy. Beat in eggs one at a time.
3. Stir in lemon zest and juice.
4. Add flour and salt; mix until just combined.
5. Pour batter into prepared loaf pan and smooth top.
6. Bake for 45-50 minutes or until a toothpick inserted comes out clean.
7. Let cool in pan for 10 minutes before transferring to a wire rack to cool completely.
Glaze:
1. Whisk together 1 cup (200g) powdered sugar, 2 tablespoons freshly squeezed lemon juice, and 1/4 teaspoon salt.
2. Drizzle over cooled cake.
Cooking Time: 45-50 minutes
Lemon Blueberry Pound Cake

Lemon Blueberry Pound Cake: A moist and flavorful dessert that combines the brightness of lemon with the sweetness of blueberries.
Ingredients:
– 1 1/2 cups all-purpose flour
– 1 cup granulated sugar
– 1/2 cup unsalted butter, softened
– 4 large eggs, at room temperature
– 2 teaspoons grated lemon zest
– 2 tablespoons freshly squeezed lemon juice
– 1 cup fresh or frozen blueberries
– Salt to taste
Instructions:
1. Preheat the oven to 325°F (165°C). Grease a 9×5-inch loaf pan and line it with parchment paper.
2. In a medium bowl, whisk together flour, sugar, and salt.
3. In a large bowl, whisk together butter, eggs, lemon zest, and lemon juice until well combined.
4. Add the dry ingredients to the wet ingredients and stir until just combined.
5. Gently fold in the blueberries.
6. Pour the batter into the prepared loaf pan and smooth the top.
7. Bake for 50-60 minutes or until a toothpick inserted into the center comes out clean.
8. Let the cake cool in the pan for 10 minutes before transferring it to a wire rack to cool completely.
Cooking Time: 50-60 minutes
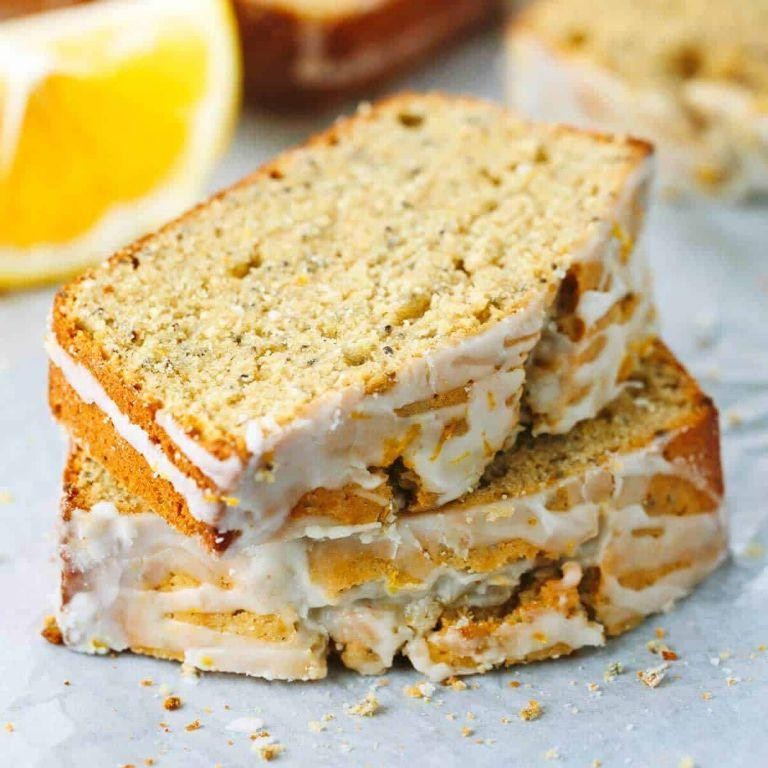
Lemon Poppy Seed Pound Cake

Brighten up your day with this moist and flavorful lemon poppy seed pound cake, perfect for a brunch or afternoon treat.
Ingredients:
– 1 1/2 cups (190g) unsalted butter, softened
– 1 3/4 cups (210g) granulated sugar
– 4 large eggs, at room temperature
– 2 teaspoons grated lemon zest
– 2 tablespoons freshly squeezed lemon juice
– 2 1/4 cups (280g) all-purpose flour
– 1 teaspoon baking powder
– 1/2 teaspoon salt
– 1 tablespoon poppy seeds
Instructions:
1. Preheat oven to 325°F (165°C). Grease a 9×5-inch loaf pan and line with parchment paper.
2. In a large bowl, cream butter and sugar until light and fluffy. Beat in eggs one at a time.
3. Stir in lemon zest and juice.
4. In a separate bowl, whisk together flour, baking powder, and salt. Add to wet ingredients and mix until just combined.
5. Fold in poppy seeds.
6. Pour batter into prepared loaf pan and smooth top.
7. Bake for 50-55 minutes or until a toothpick inserted comes out clean.
Cooking Time: 50-55 minutes
Gluten-Free Lemon Pound Cake

Liven up your dessert game with this moist and tangy gluten-free lemon pound cake, perfect for springtime celebrations or anytime you need a sweet pick-me-up.
Ingredients:
– 1 1/2 cups almond flour
– 1/2 cup coconut sugar
– 1/4 cup unsalted butter, softened
– 3 large eggs
– 2 teaspoons grated lemon zest
– 2 tablespoons freshly squeezed lemon juice
– 1 teaspoon vanilla extract
– 1/2 teaspoon salt
Instructions:
1. Preheat oven to 325°F (165°C). Grease a 9×5-inch loaf pan and line with parchment paper.
2. In a large bowl, combine almond flour, coconut sugar, and salt. Add softened butter and mix until crumbly.
3. Beat in eggs, lemon zest, lemon juice, and vanilla extract until smooth.
4. Pour batter into prepared loaf pan and bake for 45-50 minutes or until a toothpick inserted comes out clean.
5. Remove from oven and let cool on wire rack for at least 30 minutes before slicing.
Cooking Time: 45-50 minutes
Lemon Lavender Pound Cake
Brighten up your day with this refreshing pound cake infused with the sweetness of lemon and the subtle charm of lavender. This moist and flavorful dessert is perfect for springtime celebrations or a warm-weather treat.
Ingredients:
– 1 1/2 cups (190g) unsalted butter, softened
– 1 cup (200g) granulated sugar
– 4 large eggs, at room temperature
– 2 teaspoons grated lemon zest
– 2 tablespoons freshly squeezed lemon juice
– 1 cup (120g) all-purpose flour
– 1 teaspoon baking powder
– 1/4 teaspoon salt
– 1/4 cup dried lavender buds
– Confectioners’ sugar, for dusting (optional)
Instructions:
1. Preheat oven to 325°F (165°C). Grease a 9×5-inch loaf pan and line with parchment paper.
2. In a large mixing bowl, cream butter and sugar until light and fluffy. Beat in eggs one at a time.
3. Add lemon zest, juice, flour, baking powder, and salt. Mix until just combined.
4. Stir in dried lavender buds.
5. Pour batter into prepared loaf pan and smooth top.
6. Bake for 50-60 minutes or until a toothpick inserted comes out clean.
7. Let cool in pan for 10 minutes before transferring to a wire rack.
Cooking Time: 50-60 minutes
Lemon Coconut Pound Cake

This moist and flavorful pound cake combines the brightness of lemon zest with the richness of coconut flakes, creating a perfect blend of sweet and tangy. Perfect for a special occasion or a brunch gathering.
Ingredients:
– 1 1/2 cups (190g) unsalted butter, softened
– 1 cup (200g) granulated sugar
– 4 large eggs, at room temperature
– 2 teaspoons grated lemon zest
– 2 tablespoons freshly squeezed lemon juice
– 1 teaspoon vanilla extract
– 1 3/4 cups (210g) all-purpose flour
– 1 cup (60g) shredded coconut
– Salt to taste
Instructions:
1. Preheat oven to 325°F (165°C). Grease a 9×5-inch loaf pan and line with parchment paper.
2. In a large bowl, cream butter and sugar until light and fluffy, about 3 minutes.
3. Beat in eggs one at a time, then stir in lemon zest, juice, and vanilla extract.
4. Gradually add flour and coconut flakes; mix until just combined.
5. Pour batter into prepared loaf pan and smooth top.
6. Bake for 45-50 minutes or until a toothpick inserted comes out clean.
Cooking Time: 45-50 minutes
Lemon Ricotta Pound Cake

Lemon Ricotta Pound Cake: A Bright and Airy Delight
This refreshing pound cake combines the brightness of lemon zest with the creaminess of ricotta, creating a delightful treat perfect for springtime gatherings or everyday indulgence.
Ingredients:
– 1 cup (2 sticks) unsalted butter, softened
– 1 3/4 cups granulated sugar
– 3 large eggs, at room temperature
– 2 teaspoons grated lemon zest
– 2 tablespoons freshly squeezed lemon juice
– 1 cup whole milk ricotta cheese
– 2 1/4 cups all-purpose flour
– 1 teaspoon baking powder
– Salt to taste
Instructions:
1. Preheat oven to 325°F (165°C). Grease a 9×5-inch loaf pan and line with parchment paper.
2. In a large bowl, beat butter and sugar until light and fluffy. Beat in eggs one at a time, then stir in lemon zest and juice.
3. In a separate bowl, whisk together ricotta cheese, flour, baking powder, and salt. Add dry mixture to wet ingredients and mix until just combined.
4. Pour batter into prepared loaf pan and smooth top. Bake for 55-60 minutes or until a toothpick inserted comes out clean.
Cooking Time: 55-60 minutes
Lemon Yogurt Pound Cake

Brighten up your day with this refreshing Lemon Yogurt Pound Cake, perfect for a sweet treat or brunch gathering.
Ingredients:
– 1 cup unsalted butter, softened
– 2 cups granulated sugar
– 4 large eggs, at room temperature
– 2 teaspoons grated lemon zest
– 2 tablespoons freshly squeezed lemon juice
– 1 cup plain yogurt (non-fat or low-fat)
– 3 cups all-purpose flour
– 1 teaspoon baking powder
– Salt to taste
Instructions:
1. Preheat oven to 325°F (165°C). Grease a 9×5-inch loaf pan and set aside.
2. In a large mixing bowl, cream butter and sugar until light and fluffy, about 3 minutes.
3. Beat in eggs one at a time, followed by lemon zest and juice.
4. Stir in yogurt and mix until smooth.
5. Gradually add flour, baking powder, and salt; mix until just combined.
6. Pour batter into prepared loaf pan and bake for 45-50 minutes or until a toothpick inserted comes out clean.
Cooking Time: 45-50 minutes
Lemon Almond Pound Cake
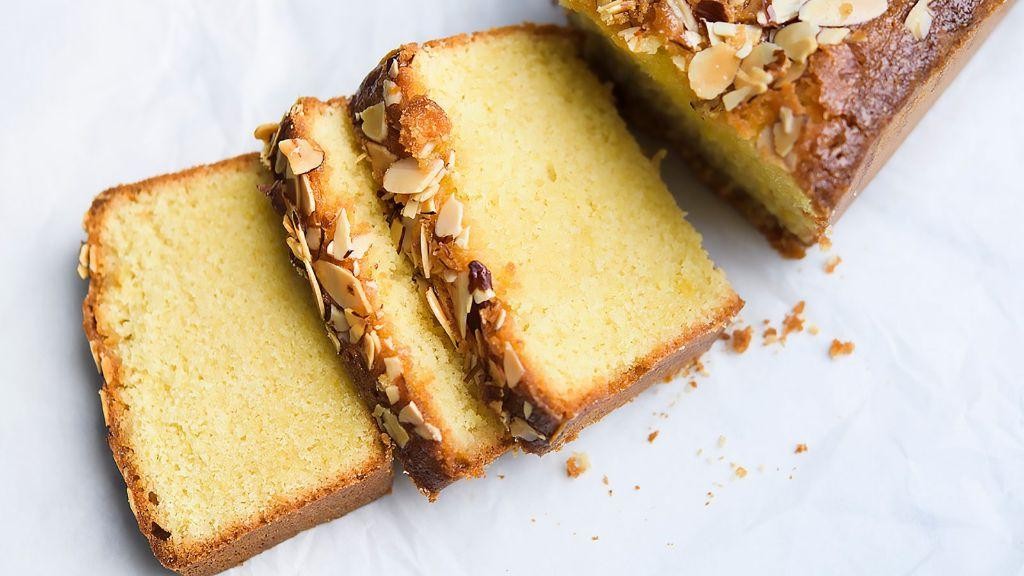
This classic pound cake gets a refreshing twist with the addition of lemon zest and almond extract, resulting in a moist and flavorful dessert perfect for springtime gatherings.
Ingredients:
– 1 1/2 cups all-purpose flour
– 1 cup unsalted butter, softened
– 3/4 cup granulated sugar
– 2 large eggs
– 1 teaspoon lemon zest
– 1 tablespoon almond extract
– 1/2 teaspoon salt
Instructions:
1. Preheat oven to 325°F (165°C). Grease a 9×5-inch loaf pan and line with parchment paper.
2. In a medium bowl, whisk together flour and salt. Set aside.
3. In a large bowl, beat butter and sugar until light and fluffy, about 2 minutes.
4. Beat in eggs one at a time, then stir in lemon zest and almond extract.
5. Gradually add the flour mixture to the wet ingredients, beating until just combined.
6. Pour batter into prepared loaf pan and smooth top.
7. Bake for 45-50 minutes or until a toothpick inserted comes out clean.
Cooking Time: 45-50 minutes
Lemon Chia Seed Pound Cake
Brighten up your day with this moist and flavorful lemon chia seed pound cake, infused with the subtle nutty flavor of chia seeds and a hint of citrus from freshly squeezed lemon juice.
Ingredients:
– 1 cup (200g) unsalted butter, softened
– 1 3/4 cups (210g) granulated sugar
– 2 large eggs
– 1/2 cup (60g) plain Greek yogurt
– 1/2 cup (30g) chia seeds
– 2 teaspoons grated lemon zest
– 2 tablespoons freshly squeezed lemon juice
– 2 3/4 cups (315g) all-purpose flour
– 1 teaspoon baking powder
– Salt, to taste
Instructions:
1. Preheat oven to 325°F (165°C). Grease a 9×5-inch loaf pan and set aside.
2. In a large bowl, cream butter and sugar until light and fluffy. Beat in eggs one at a time.
3. Stir in yogurt, chia seeds, lemon zest, and lemon juice.
4. Gradually add flour, baking powder, and salt. Mix until just combined.
5. Pour batter into prepared loaf pan and smooth top.
6. Bake for 50-55 minutes or until a toothpick inserted comes out clean.
Cooking Time: 50-55 minutes
Lemon Ginger Pound Cake

Lemon Ginger Pound Cake: A moist and flavorful dessert that combines the brightness of lemon with the warmth of ginger, perfect for a sweet treat or special occasion.
Ingredients:
– 1 cup (2 sticks) unsalted butter, softened
– 1 3/4 cups granulated sugar
– 4 large eggs, at room temperature
– 2 teaspoons grated fresh ginger
– 2 tablespoons freshly squeezed lemon juice
– 2 1/4 cups all-purpose flour
– 1 teaspoon baking powder
– Salt to taste
Instructions:
1. Preheat oven to 325°F (165°C). Grease a 9×5-inch loaf pan and line with parchment paper.
2. In a large bowl, cream the butter and sugar until light and fluffy, about 3 minutes.
3. Beat in eggs one at a time, followed by ginger and lemon juice.
4. In a separate bowl, whisk together flour and baking powder. Add to the wet ingredients and mix until just combined.
5. Pour batter into prepared loaf pan and smooth top.
6. Bake for 55-60 minutes or until a toothpick inserted in the center comes out clean.
Lemon Honey Pound Cake

Brighten up your day with this moist and flavorful pound cake infused with the sweetness of honey and the tanginess of lemon.
Ingredients:
– 1 1/2 cups all-purpose flour
– 1 cup granulated sugar
– 1/2 cup unsalted butter, softened
– 2 large eggs
– 2 teaspoons grated lemon zest
– 2 tablespoons freshly squeezed lemon juice
– 1 tablespoon honey
– Salt to taste
Instructions:
1. Preheat oven to 325°F (165°C). Grease a 9×5-inch loaf pan and set aside.
2. In a large mixing bowl, whisk together flour, sugar, and salt.
3. Add softened butter and mix until a crumbly mixture forms.
4. Beat in eggs one at a time, followed by lemon zest and juice.
5. Stir in honey until well combined.
6. Pour batter into prepared loaf pan and smooth top.
7. Bake for 50-60 minutes or until a toothpick inserted comes out clean.
8. Let cool in pan for 10 minutes before transferring to a wire rack.
Cooking Time: 50-60 minutes
Vegan Lemon Pound Cake

Brighten up your day with this moist and tangy vegan lemon pound cake, perfect for snacking or serving at your next gathering.
Ingredients:
– 1 1/2 cups all-purpose flour
– 1 cup granulated sugar
– 1/2 cup unsweetened almond milk
– 1/4 cup canola oil
– 2 teaspoons baking powder
– 1 teaspoon lemon zest
– 2 tablespoons freshly squeezed lemon juice
– 1 teaspoon vanilla extract
Instructions:
1. Preheat your oven to 350°F (180°C). Grease a 9×5-inch loaf pan and line with parchment paper.
2. In a large mixing bowl, whisk together flour, sugar, baking powder, and salt.
3. In a separate bowl, combine almond milk, oil, lemon zest, lemon juice, and vanilla extract.
4. Pour the wet ingredients into the dry ingredients and mix until just combined.
5. Pour the batter into the prepared loaf pan and smooth the top.
6. Bake for 45-50 minutes or until a toothpick inserted comes out clean.
Cooking Time: 45-50 minutes
Lemon Cream Cheese Pound Cake
This moist and flavorful pound cake combines the brightness of lemon zest with the richness of cream cheese, making it a perfect dessert for any occasion.
Ingredients:
– 1 1/2 cups (190g) unsalted butter, softened
– 2 cups (250g) granulated sugar
– 4 large eggs, at room temperature
– 2 teaspoons grated lemon zest
– 2 tablespoons freshly squeezed lemon juice
– 2 ounces cream cheese, softened
– 3 1/2 cups (450g) all-purpose flour
– Salt, to taste
Instructions:
1. Preheat oven to 325°F (165°C). Grease a 9×5-inch loaf pan and line with parchment paper.
2. In a large bowl, cream butter and sugar until light and fluffy. Beat in eggs one at a time.
3. Stir in lemon zest, lemon juice, and cream cheese until well combined.
4. Gradually add flour, beating until just combined.
5. Pour batter into prepared pan and smooth top.
6. Bake for 55-60 minutes or until a toothpick inserted comes out clean.
Cooking Time: 55-60 minutes
Lemon Thyme Pound Cake

This moist and flavorful pound cake is infused with the brightness of lemon zest and the subtle warmth of thyme, making it a perfect dessert for springtime gatherings or afternoon tea.
Ingredients:
– 1 cup (2 sticks) unsalted butter, softened
– 1 3/4 cups all-purpose flour
– 1 cup granulated sugar
– 2 teaspoons baking powder
– 1 teaspoon salt
– 2 large eggs, at room temperature
– 2 tablespoons freshly squeezed lemon juice
– 1 tablespoon grated lemon zest
– 1 tablespoon chopped fresh thyme
Instructions:
1. Preheat the oven to 325°F (165°C). Grease a 9×5-inch loaf pan and line it with parchment paper.
2. In a large bowl, cream together butter and sugar until light and fluffy.
3. Beat in eggs one at a time, then stir in lemon juice, zest, and thyme.
4. In a separate bowl, whisk together flour, baking powder, and salt.
5. Gradually add the dry ingredients to the wet mixture, mixing until just combined.
6. Pour batter into prepared loaf pan and smooth top.
7. Bake for 50-60 minutes or until a toothpick inserted into the center comes out clean.
Cooking Time: 50-60 minutes
Lemon Olive Oil Pound Cake

Brighten up your dessert table with this moist and flavorful Lemon Olive Oil Pound Cake, infused with the zesty aroma of lemon zest and the richness of olive oil.
Ingredients:
– 1 cup (200g) unsalted butter, softened
– 1 3/4 cups (210g) granulated sugar
– 4 large eggs, at room temperature
– 2 teaspoons grated lemon zest
– 2 tablespoons freshly squeezed lemon juice
– 1/2 cup (120ml) olive oil
– 2 1/4 cups (285g) all-purpose flour
– 1 teaspoon baking powder
– Salt, to taste
Instructions:
1. Preheat oven to 325°F (165°C). Grease a 9×5-inch loaf pan and line with parchment paper.
2. In a large mixing bowl, cream together butter and sugar until light and fluffy.
3. Beat in eggs one at a time, followed by lemon zest and juice.
4. With the mixer on low speed, gradually add flour, baking powder, and olive oil.
5. Pour batter into prepared loaf pan and smooth top.
6. Bake for 50-60 minutes or until a toothpick inserted comes out clean.
7. Let cool in pan for 10 minutes before transferring to a wire rack to cool completely.
Cooking Time: 50-60 minutes
Lemon Rosemary Pound Cake

This moist and flavorful pound cake combines the brightness of lemon zest with the earthy aroma of rosemary, perfect for a springtime dessert or afternoon snack.
Ingredients:
– 1 cup (2 sticks) unsalted butter, softened
– 1 3/4 cups all-purpose flour
– 1 cup granulated sugar
– 2 large eggs
– 2 teaspoons grated lemon zest
– 2 tablespoons freshly squeezed lemon juice
– 2 sprigs fresh rosemary, chopped (about 2 tablespoons)
– Salt to taste
Instructions:
1. Preheat oven to 325°F (165°C). Grease a 9×5-inch loaf pan and line with parchment paper.
2. In a large bowl, cream butter and sugar until light and fluffy. Beat in eggs one at a time.
3. Stir in lemon zest, lemon juice, and chopped rosemary.
4. Add flour and salt; mix until just combined.
5. Pour batter into prepared loaf pan and smooth top.
6. Bake for 50-60 minutes or until a toothpick inserted into the center comes out clean.
Cooking Time: 50-60 minutes
Lemon Matcha Pound Cake
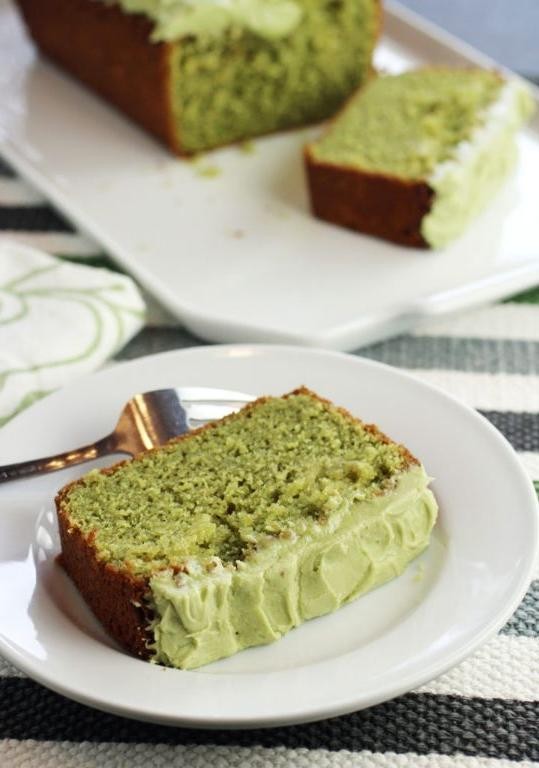
This moist and flavorful pound cake combines the brightness of lemon zest with the subtle grassiness of matcha green tea, creating a unique and delicious dessert perfect for any occasion.
Ingredients:
– 1 1/2 cups all-purpose flour
– 1 cup granulated sugar
– 1/2 cup unsalted butter, softened
– 2 large eggs
– 1 tsp vanilla extract
– 1/4 cup matcha powder
– 1/2 cup freshly squeezed lemon juice
– 1 tbsp grated lemon zest
– Salt to taste
Instructions:
1. Preheat oven to 325°F (165°C). Grease a 9×5-inch loaf pan and line with parchment paper.
2. In a medium bowl, whisk together flour, sugar, and matcha powder.
3. In a large bowl, whisk together butter, eggs, and vanilla extract until smooth.
4. Add the dry ingredients to the wet ingredients and stir until just combined.
5. Stir in lemon juice and zest.
6. Pour batter into prepared loaf pan and bake for 45-50 minutes or until a toothpick comes out clean.
7. Remove from oven and let cool in pan for 10 minutes before transferring to a wire rack.
Cooking Time: 45-50 minutes
Summary
Get ready to brighten up your baking with these 18 scrumptious lemon pound cake recipes! From classic flavors to unique twists, there’s something for every occasion. Indulge in the simplicity of Classic Lemon Pound Cake with Glaze or try one of the many variations like Lemon Blueberry Pound Cake or Lemon Poppy Seed Pound Cake. For those with dietary restrictions, don’t worry – Gluten-Free, Vegan, and other options are available. Whether you’re celebrating a special event or just want to treat yourself, these lemony lovelies are sure to impress.